How to prepare for a vendor event: Your small business prep guide
Want your small business to shine at vendor events? Map out your plan. Presented by Chase for Business.

- A successful vendor event requires careful planning and consideration of key factors, including the event’s history and reputation, your target audience and associated costs.
- Depending on the business and the products, a seller’s permit, business license and other specific permits may be required to participate.
- After the event, it’s important to follow up by counting inventory, reconciling finances and contacting new leads to turn interest into future sales.
Step into your next vendor event with the right preparation and a strategic mindset. With a solid plan, you can turn your participation into a catalyst for new leads and brand growth.
This step-by-step guide will walk you through key prep work — from vendor events research and booth design to post-event follow-ups — so you can approach each event with confidence and clarity.
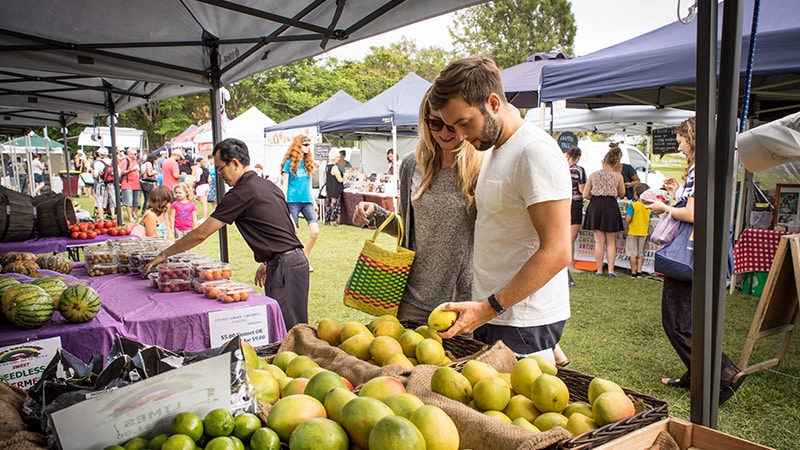
Vendor event selection and research
It takes time and resources to plan a successful booth. But before you can start planning, you’ll need to choose the type of vendor event that best fits your business objectives. Here are a few points to consider.
Types of vendor events
From craft fairs and farmers markets to trade shows and pop-up shops, vendor events come in many shapes and sizes. Some spotlight handmade, vintage or artistic goods, while others focus on specific industries, product categories, seasons or the broader mission of supporting local businesses.
Each offers unique advantages and challenges, so it’s worth weighing your options carefully to find the vendor event that best fits your small business.
Vendor history and reputation
Once you’ve found options that interest you, it’s a good idea to research the event’s track record. Look for details like how long the event has been running, who attends and how it’s promoted.
To help you maximize the return on investment (ROI) from the vendor event, a well-organized event with a strong attendance and positive endorsements from other attendees could indicate it’s a worthwhile investment.
Alignment with your business goals
The best vendor event for your business is one that helps you achieve your broader objectives, whether that’s to boost sales, build brand awareness, test a new product or expand into a different market. Consider your target audience, budget and desired outcomes, and choose events that will help move your business in the right direction.
For instance, if your business sells handmade ornaments, a holiday market in December would be a more strategic choice than a general craft fair in the spring.
Vendor event planning and research
Once you’ve identified the event you’d like to participate in, it’s time to plan. Thinking through the details now will help you avoid costly surprises and set you up for a successful experience. These are a few important factors to take into consideration.
Target audience and expected foot traffic
What is the expected audience and turnout for your chosen vendor event? The closer the event’s attendees match your target audience the more likely you’ll find meaningful connections and boosted sales.
Associated costs
Beyond initial booth fees, other costly considerations might come into play. Remember to budget for other costs like travel, lodging, insurance and marketing materials. Some events may even charge extra for electricity or table rentals. As you plan, you may consider using a business checking account for these costs to keep your personal and business finances distinct.
Competitor pricing
Before setting your prices for an event, consider what similar vendors in your industry are charging so you can price competitively, while aiming to meet your profit goals. Instead of just price matching, use this research as a guideline to establish a price point that is fair to both you and your customers.
Vendor marketing and promotion
Look at how the event organizers are getting the word out. A strong online presence can be a powerful tool to increase foot traffic and attract relevant audiences. Sharing their posts and using any official hashtags can also maximize your exposure by combining your marketing efforts with theirs.
Logistics and location
It’s important to evaluate venue accessibility, amenities and setup requirements. Factor in parking, setup and teardown times and the convenience of the location for both you and your customers.
Vendor permits and licenses
Depending on your business type and what you’re selling, you may be required to obtain certain permits and licenses before you can participate.
Use this checklist to identify the most common requirements and ensure you’re fully prepared.
Seller’s permit
This is a common kind of permit required by most states for selling taxable goods. It allows you to collect sales tax from customers and submit this money to the state. Check with your state's Department of Revenue or taxation agency to determine whether you need one.
General business license
A business license grants you permission to sell products or services within a specific city or county. General business licenses are often a local requirement, but some states may also require one, so you should determine what is needed by checking your local city and county government websites.
Food handler and health department permits
If you sell food or beverages at the vendor event, you’ll need certification proving that food safety standards are met. Requirements vary depending on location, types of food you are selling and event details, so be sure to check your local health department and your event organizer.
Business liability insurance
Accidents happen, so it’s important to protect your business in case of injuries or property damage during the event. Many event organizers require proof of coverage, so you should check their application or reach out to them directly to understand their specific insurance requirements.
Event-specific permits
Temporary use and street vendor permits are two common requirements for certain events –– especially outdoor events in public spaces like parks or streets. Always check with the event organizer to see if these or any other specific permits are needed.
Vendor application
You’ll also want to complete any other official applications from the event organizer. You’ll most likely provide information about your business, products and a copy of your liability insurance and other key documentation.
Tips for designing your booth
Once you've figured out all the logistics — including permits, timing and budgeting — it's time to get creative and design a booth that stands out.
Visual design and branding
You’ll want your booth to grab the attention of visitors and showcase your brand identity. Using consistent colors, branding and cohesive elements across your display makes your space inviting, professional and digestible. You may also want to seek out inspiration online by searching keywords like “vendor table display ideas” or “creative vendor booth ideas.”
Inventory and product display
Once you’ve determined how much inventory you’ll need to meet event demand, focus on displaying it in a way that draws customers in. Showcase your bestsellers, create opportunities for customers to browse and avoid overcrowding your booth — a clean, organized display helps products shine.
Accepting payments and generating future sales
Once your booth looks great, you’ll want a plan for managing day-of transactions and creating future business. Here’s what to consider:
- Day-of transactions: For smoother transactions at the event, have a system in place to handle cash and accept credit card payments.
- Future business: Consider running special promotions at the event, such as a discount code for a future online purchase or an incentive for signing up for your email list.
Marketing your booth before the event
The more you promote your participation ahead of time, the more likely you are to draw customers to your booth. Here are some practical online and offline tactics that can build anticipation, spread the word and make it easy for people to find you at the event:
- Announce your participation early. Let your audience know where and when they can find you, along with key event details.
- Create a countdown campaign. Post regular updates as the event approaches –– for example, “10 days to go” –– posted with sneak peeks of products or event-only offers.
- Share behind-the-scenes content. Give your followers a glimpse of your preparation process, from packing inventory to setting up displays, to build connection.
- Promote event-specific offers. Draw in visitors by offering a discount, giveaway or exclusive product that’s available only at the event.
- Use official hashtags. Include official event hashtags and location-based tags on your social media to tap into a wider audience.
- Send an email announcement. Reach your existing customer base directly with event details, booth location and any special promotions by leveraging email marketing.
- Collaborate with the event organizer. Boost your reach by sharing their posts, cross-promoting content and securing features in official marketing.
‘Day-of’ vendor event checklist
On the day of the event, preparation is key to making sure things run smoothly. Here are some plans to have in place so you can focus on making connections and boosting sales:
- Transportation and setup planning: Factor in travel time, parking and where you can unload. Make sure you have any tools needed for booth assembly, and allow enough time to set up before customers arrive.
- Booth arrangement and merchandising: Have a plan for who will handle the physical booth setup. Will you need assistance? What time should you start?
- Staffing and responsibilities: Ensure your booth runs smoothly during busy periods by assigning clear roles to each team member. Decide who is restocking, handling payments or engaging with customers.
- Inventory management and storage: Organize your supply of products so you can easily restock popular items, keep your booth looking full and easily track sales.
- Payment acceptance: Have a clear plan for how you’ll accept payments. If you accept cash, bring plenty of small bills and coins for change. For credit and debit card transactions, make sure you have a reliable card reader and backup battery.
- Contingency planning: Prepare for the unexpected with a “vendor emergency kit.” Some essentials could include tape, scissors, extra signage, backup payment options, portable chargers, weather protection (tents, tarps, weights) and a basic first aid kit.
Following up after the event
Even after a successful event, your work as a business owner isn’t quite done. Maximize your results with post-event follow-ups.
Count your inventory
Do a full inventory check to see what your bestselling items were, which items didn’t sell, and which items you need to restock. This can help you plan inventory accordingly for your next vendor event.
Reconcile finances
Make sure you have all transactions on record for accounting and tax purposes. You’ll need to review sales, track expenses and calculate your net profit.
Follow up on leads
Send personalized messages to potential customers or partners to keep the conversation going and turn their interest into future sales.
Send thank-you notes
A simple thank-you not only makes your business memorable but also helps build loyalty in customers and event organizers. Whether it’s through email, snail mail or on social media, it’s important to show appreciation.
Update your customer database
While the interactions from the event are still fresh in your mind, add any new contacts to your customer list or customer relationship management. Consider including any notes on preferences or purchase history to help you maintain the relationship and conduct business with them in the future.
FAQs about vendor event preparation and tips
How can I attract customers to my booth?
Beyond using clear signage and eye-catching branding, there are several ways to make your booth memorable. Offer free samples, live demonstrations or limited-time offers that invite people to stop and explore.
How early should I arrive to set up my booth?
This may vary depending on your plans, but a general guideline is to arrive one to two hours before the event starts to ensure you have time to unload, set up and troubleshoot any problems before customers arrive.
How do I make my booth stand out?
Incorporate bold colors, unique props or branded décor — and you might even play upbeat music (if allowed). Make sure your booth is well organized and cohesive, but also creative enough to be memorable.