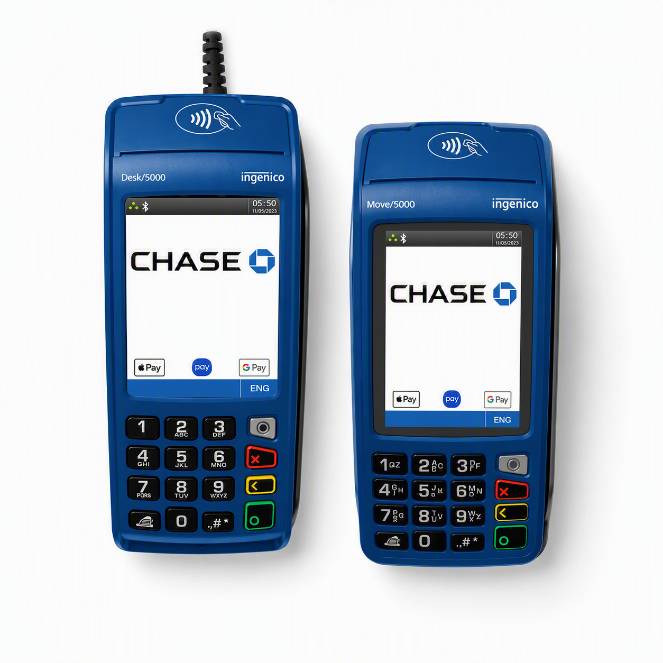
Get help for the all-in-one card reader — Move/5000 (Wireless) and Desk/5000 (Countertop). Choose your terminal below to get the right guidance:
Just received your Move/5000?
Expand the steps below to follow the setup process—from unboxing your device to running your first transaction.
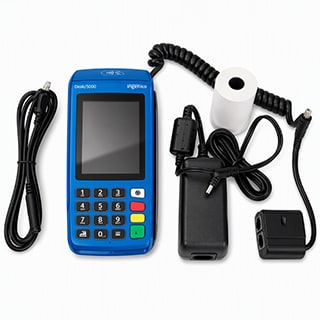
Let’s make sure you’ve got everything before starting the setup:
You should have:
- Move/5000 terminal
- Power adapter and charging cable
- Charging base (if included)
- Receipt paper roll
If anything is missing, contact us before continuing.
All set? Awesome — let’s get things rolling!
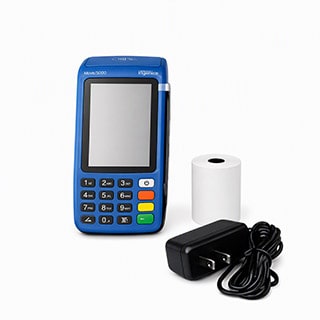
Make sure you have access to a power outlet and allow enough time for the terminal to fully charge before first use
This is required to process refunds, add users, change your Move5000’s settings, and more.
1. Give us a call:
- Dial 1-888-886-8869
- Have your merchant ID ready—this helps us find your account quickly
2. Request credentials:
- Tell the representative you’re setting up your terminal and need your Admin username and password
3. Record information:
- Write down both the username and password exactly as provided
- You’ll need these for steps like connecting to Wi-Fi and managing terminal settings
4. Store safely
- Keep your credentials in a secure and accessible place
- You’ll use them whenever you need to access Admin Mode or make changes to your terminal
Tip: If you ever misplace your Admin or Manager credentials, just call us and we will help you recover them.
Ready to get online? Make sure you have your Wi-FI password handy, Here’s how:
1. Give us a call:
- Press the gray key for the Admin Menu
- Tap Admin Mode
- Enter the Admin Password and press the green key
- Tap the Tetra Admin icon
- Press [3] for Configure Wi-Fi
- Press [1] for Scan Networks
- Tap on your Wi-Fi network and enter your Wi-Fi password then press the green key
- Tap on the ABC icon on the screen if your password contains letters
- Once you’re connected, you’ll see “New Profile Okay”
Tip: Your terminal will remember your Wi-Fi, so you won’t need to reconnect next time!
Go here to watch a video tutorial.
Let’s make sure everything’s working before serving customers—try running a quick $0.01 sale with your own card:
- Press the green key to access the Main Menu
- Press [0] or tap the Sale icon
- Enter $0.01, then press the green key
- Tap, insert, swipe or manually enter your card
- When “Approved” appears, you can remove your card
- The receipt prints—want a customer copy? Just press [2-Yes] or the green key
Boom! You just ran your first transaction.
Go here to watch a video tutorial.
Your terminal is usually set up for automated settlement at a set time each day, but you can manually close a batch and settle whenever you need. Here’s how to close your batch:
- Press the green key to access the Main Menu
- Press [0] or tap the Sale icon
- Enter $0.01, then press the green key
- Tap, insert, swipe or manually enter your card
- When “Approved” appears, you can remove your card
- The receipt prints—want a customer copy? Just press [2-Yes] or the green key
Boom! You just ran your first transaction.
Go here to watch a video tutorial.


Common issues and troubleshooting tips
No worries — let’s walk through some quick steps to get your terminal back online
1. Restart your terminal
- Hold [#] and Yellow key together for 5 seconds
- Wait 10 seconds, then power it back on
2. Check date and time
- Press the gray key to access the Admin Menu
- Go to Admin Mode, enter your password, and press the green key
- Tap Tetra Admin
- Press [2] for Set Date and Time
- Update Date [1] or Time [2] if needed
3. Determine your connection method first:
Check the icons in the upper left of your screen: Wi-Fi, Bluetooth, or 4G
Wi-Fi Connection
Check your connection status
Look for the Ethernet icon (three squares forming a triangle in a circle) at the top left of your screen
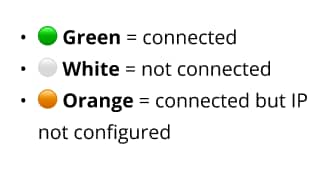
Green = connected
White = not connected
Orange = trying to connect (If you see orange, reach out to your local IT or internet service provider for help with your connection or IP settings)
If you see a white or orange light, try these steps:
1. Check your Wi-Fi
- Move closer to your router
- Avoid guest networks that require browser login
2. Restart your modem/router
- Unplug for 30 seconds, then plug back in
3. Check your internet
- Open a website on another device using the same network
4. Check you’re connected to the right Wi-Fi:
- Press the gray function key to access the Admin Menu
- Go to Admin Mode, enter your password, and press the green [Enter] key
- Tap Tetra Admin
- Press [3] for Configure Wi-Fi
- Press [2] for My Networks
- Check your network settings
Bluetooth Connection
Check Bluetooth indicator:
Green = connected
White = not connected
Orange = connected but IP not configured
If you see a white or orange light, try these steps:
- Restart your terminal
- Validate your network settings
- If still not connected, follow the Base not found steps
4G Connection
Check the signal bars on your screen
- 5 bars = very strong signal
- 4 bars = strong signal
- 3 bars = good signal
- 2 bars = may be slow
- 1 bar = weak signal
- 0 bars = no signal
If signal is low:
- Restart your terminal
- Try moving to a different location for better signal
- Validate your network settings
- Confirm date and time is correct
- Try a test transaction
Still not working?
- Give us a call and we’ll help you get back up and running
Note: If you prefer a visual walkthrough, go here.
Try these quick steps:
1. Check your Wi-Fi
- Make sure your internet is working on another device
- Move closer to your router
- Avoid guest networks that require browser login
2. Restart the terminal
- Hold the Yellow key and # key together for 5 seconds
- Wait for “Reset in Progress”
3. Reconnect to Wi-Fi
- Go to Admin mode ⟩ Tetra Admin ⟩ Configure Wi-Fi ⟩ Scan Networks
- Choose your network and re-enter the password
- If it doesn’t ask for the password, click on FORGET NETWORK and try again
4. Restart your router
- Unplug for 30 seconds, then plug back in
If you’re still not connected, contact us and we’ll help you get back up and running.
No worries — let’s get your terminal reconnected to its base:
- Make sure your terminal is close by and off the base
- Press the gray function key to access the Admin Menu
- Tap Admin Mode
- Enter the Admin Password and press the green key
- Tap the Tetra Admin icon
- Press [4] for Configure Bluetooth
- Press [1] for Base
- Press [3] for Remove Base
- Choose a base and tap the green circle on the screen to confirm. Repeat if you have multiple bases
- Back in the Bluetooth Menu, press [1] for Add Base and dock your terminal
- When you see “Base Association Ok,” you’re all set
Go here to watch a video tutorial.
Try these quick steps:
1. Check your Wi-Fi
- Make sure the Wi-Fi symbol is showing on your screen
2. Restart the terminal
- Hold the Yellow key and # key together for 5 seconds
- Wait for “Reset in Progress”
3. Try another payment method
- Ask your customer to use a different card, or try inserting instead of tapping
4. Check the error message
- Transaction declined: The card issuer declined it
- Communication error: There’s an internet issue. Learn how to fix it here
- Batch full: Run settlement from Menu › Settlement
If the issue keeps happening, contact us and and have your Merchant ID and the error message ready.
Missed your batch report because of a paper jam or running out of paper? No worries — here’s what you can do:
If your batch is already settled:
- Check online: Log in to your online Chase account to view, download, or print your batch reports anytime
- Give us a call: Our support team can email reports directly to you if you need a copy
If your batch is still open:
- Press # to access Admin Menu
- Enter Admin name [ADMIN] and Admin password
- Choose [2] for batch menu
- Choose [2] for view history
- Choose [3] for last batch
- Choose how to sort transactions
- Tap the the print icon on the screen to print
Tip: For settled batches, Chase Business Online is your go-to for reports. Go here for more information.
A pre-authorization puts a temporary hold on funds — perfect for bookings or services to ensure the funds are available at the time of payment. Here’s how to do it:
- Press the green key for the main menu
- Swipe up and tap the Pre-Auth icon, then press the green key
- Key in the amount and press the green key
- Customer taps, inserts, or swipes. You also have the option manually enter their card details
- Press the green key to continue
- Receipt prints — want a customer copy? Just press [2-Yes] and then the green key
Go here to watch a video tutorial.

Fix most glitches fast:
- Hold the Yellow key and # key together for 5 seconds
- Wait for “Reset in Progress”
When the Chase logo appears, you’re good to go


Look at the connectivity indicator on your screen:

Need a copy ?
- Press the green key
- Swipe up and tap Reprint
- Press [1] for Last Receipt or [2] to search
- Pick how to search, then choose [1-merchant] , [2-customer] or [3-both]
- Press [Enter] — your receipt prints



Pro tip: You can press the keys or tap the screen — whichever feels easiest for you.
Move/5000 terminal FAQ
Explore frequently asked questions to learn how to get the most out of your All-in-One Card Reader
- Press the green key for the main menu
- Press [0] or tap the Sale icon on the screen
- Enter the amount and press the green key. If tips are enabled, add or review the tip
- Ask the customer to tap, insert, swipe or manually enter their card details
- Approved appears. Customer removes their card
- Receipt prints — want a customer copy? Just press [2-Yes] and then the green key
Go here to watch a video tutorial.
Note: Debit cards can’t be entered manually.
- Press the green key to open the main menu
- Press [1] or tap the Return icon
- Enter your Manager password then press the green key
- Enter the refund amount and press the green key
- Ask the customer to tap, insert, swipe or manually enter their card details
- When “Refund Confirmation” appears, press the green key
- Receipt prints — want a customer copy? Just press [2-Yes] and then the green key
Go here to watch a video tutorial.
Note: Debit cards can’t be entered manually.
Need to cancel a transaction before your batch settles? No problem—just follow these steps:
- Press the green key for the main menu
- Press [2] or tap the Void icon
- Enter your Manager password then press the green key
- Choose [1-No] or [2-Yes] to void a pre-auth.
- Use the search menu to find your transaction (search by All, Reference #, Clerk #, Invoice #, Card #, PO #, RRN, Approval code or Customer ref. number)
- If you choose All, use the arrows to scroll through transactions and press the green key to choose
- Confirm void by pressing [2] Yes and the green key
- Receipt prints — want a customer copy? Just press [2-Yes] and then the green key
Go here to watch a video tutorial.
A pre-authorization puts a temporary hold on funds—perfect for bookings or services to ensure the funds are available at the time of payment. Here’s how to do it:
- Press the green key for the main menu
- Swipe up and tap the Pre-Auth icon
- Key in the amount and press the green key
- Ask the customer to tap, insert, swipe or manually enter their card details
- Press the green key to continue
- Receipt prints — want a customer copy? Just press [2-Yes] and then the green key
Go here to watch a video tutorial.
To complete a pre-authorization and turn it into a sale, follow these steps. Once finished, the pre-authorization will be processed as a sale and funded:
- Press the green key for the main menu
- Swipe up and tap the Force icon
- Enter your Manager password then press the green key
- Choose [2] for Pre-auth completion
- Use the search menu to find your transaction (search by All, Reference #, Clerk #, Invoice #, Card #, PO #, RRN, Approval code or Customer ref. number)
- Choose [1-Accept] to confirm or [2-Change] to update the amount
- Terminal connects and processes the completion
- Receipt prints — want a customer copy? Just press [2-Yes] and then the green key